April 14, 2020 openssl Git Bash Certificate Authority TLS certs
Setting up a development environment with valid HTTPS certs
I have been getting familiarized with PKI and certificate processes through some activities at work recently and decided I wanted to see how hard it’d be to implement my own Certificate Authority, and enforce https traffic for my projects on my local development machine. Also, since I plan on running my Crypto-bot server live on my home network soon, it would be smart of me to make sure all traffic to/from those APIs is encrypted, and using certs that are trusted by my users’ operating systems and browsers. So I decided my experiment here would be to get local certs setup to enforce https on both my React web app and node back-end. If my browsers (Chrome, FIrefox, and Postman) all verify my certs and the app functionality all works, then I’ll know I was successful.
Starting Create React App with HTTPS enabled
First, let’s configure our React app to startup with https enabled. I’m running on Windows, so the command is a little different, but to do this, simply update your start script in package.json to the following:
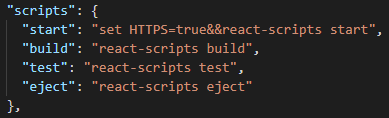
"start": "set HTTPS=true&&react-scripts start",
The scripts block in your package.json file should now look like this.
This is effectively enabling HTTPS before kicking off your webpack start script. If no cert currently exists in the ./node_modules/webpack-dev-server/ssl directory, webpack will create a new certificate and load it in for you.
Now, go ahead restart your React app and then navigate to it in your browser (this time making sure to prepend https, e.g. https:/localhost:3000). What do you see?

Like me, you probably got the same “Not Secure” error in your address bar noting that your connection is insecure. This is because even though webpack is passing the server.pem certificate it generated to your web browser, your web browser does not trust it because it is self-signed, and not signed by a trust CA. Let’s fix that!
Creating your own Certificate Authority in Dev
Creating and managing certificates isn’t always the easiest concept to grasp. I made this diagram to illustrate the general steps involved in a server obtaining a signed certificate from a Certificat Authority.

In this section we’ll go through the steps to:
- Setup you SSL config file
- Create your own CA
- Create a cert request from your server
- Have CA sign your server’s cert request
Creating your own Certificate Authority
An important bit of information before we proceed any further: Because I am Windows user, I will be using Git Bash, but note that the commands will be slightly different than nix-based environments.
We’ll go ahead and create a directory structure for our CA. I’ll do this in my home directory by issuing the following commands:
mkdir ~/ca
cd ~/ca
mkdir certs crl newcerts private
touch index.txt
echo 1000 > serial
Next, we must setup an configuration file that openssl will use to draw configuration options from. At the ~/ca root, create a new file called openssl.cnf and add the example configuration I’ve published at this link. Keep in mind, the “ca” section is mandatory, it instructs oppenssl to reference the options from the CA_default section. This site does a nice job at explaining some of the options in this configuration if curious.
Creating the root CA key and cert
Let’s go ahead and generate the root CA key and place it into the /private directory by issuing the following command.
winpty openssl genrsa -aes256 -out private/ca.key.pem 4096
Now, go take a look to make sure you have a ~/ca/private/ca.key.pem now. Of course, this is a key, and we must keep it as secure as possible! With it, anybody can sign certs on behalf of our CA.
Okay, now navigate back to your root and issue this command to generate your CA cert using the key we just created.
winpty openssl req -config openssl.cnf \
      -key private/ca.key.pem \
      -new -x509 -days 7300 -sha256 -extensions v3_ca \
      -out certs/ca.cert.pem
Notice we have added an extension of v3_ca which maps to that section in the config file we created earlier. As with any cert creation using openssl, we’ll be prompted for a series of questions to gain detail about the server. Once done… we have a fresh new CA cert waiting for us in the /certs folder… awesome!
Creating and validating a server certificate
Next up. We have to generate a key on our web server, which in our case, has already automatically been done for us by webpack by virtue of enabling HTTPS in our earlier step. You can find it in the ./node_modules/webpack-dev-server/ssl directory. For the sake of simplicity, let’s go ahead and copy that key into a new file at the following location ~/ca/private/localhost.pem.
One point of knowledge before we can generate a cert request: In order to successfully verify a cert, browsers require the name on the cert to match the root DNS anme the URL bar. So, in our case, our cert must show localhost because that’s the root in the URL bar.
How do we do that? It’s done using the commmonName value that is specified when creating the cert (at least this is true for Firefox).
Other modern browsers like Chrome require that a certificate subjectAltName attribute value be set instead of the more commonly used commonName attribute. In order to add it to our cert we have to add an extension file and include a reference to that file in our csr command. So, go ahead and create a file at your /ca root and call it v3.ext. Populate it with the content in this gist I have created (notice, at the end you can uncomment the IP line to add an IP reference if your server has a static IP).
Done? Okay, now we can issue the following command to generate our CSR (notice we have):
winpty openssl req -config openssl.cnf -key private/localhost.pem -new -sha256 -out csr/localhost.csr -extensions v3.ext
You should now have your CSR, and we only have one more step to get it signed by our new CA. Let’s go ahead and issue this next command to have a new cert (with 300 days of vaidity) generated.
winpty openssl ca -config openssl.cnf -extensions server_cert -days 300 -notext -md sha256 -in csr/localhost.csr -out certs/localhost.pem -extfile v3.ext
We can run this command now to verify our new cert.
winpty openssl verify -CAfile certs/ca.cert.pem -untrusted certs/localhost.pem
Your new cert should be available in your certs folder. Let’s copy the content of that file back into your ./node_modules/webpack-dev-server/ssl/server.pem file. Overwriting the previous cert (i.e. all the content between these lines)
-----BEGIN CERTIFICATE-----
-----END CERTIFICATE-----
References
- CA setup: https://jamielinux.com/docs/openssl-certificate-authority/sign-server-and-client-certificates.html
- Cert common Name attribute: https://support.dnsimple.com/articles/what-is-common-name/
- Chrome requires subjectAltName: https://www.freecodecamp.org/news/how-to-get-https-working-on-your-local-development-environment-in-5-minutes-7af615770eec/
- Set subjectAltName https://superuser.com/questions/1202498/create-self-signed-certificate-with-subjectaltname-to-fix-missing-subjectaltnam