December 27, 2020 pivpn Raspberry Pi
Overview
Ever want to connect to your home network securely when away from home? The benefits are pretty awesome. Use it to ssh into a home server, configure your router or smart home devices. One of the best ways to do this is via VPN. This guide will walk through how to convert your Raspberry Pi inta a dedicated home VPN server using totally free and open source software.
Prepare your Raspberry Pi
If you don’t already have an operating system on your Raspberry Pi, follow these steps to get started:
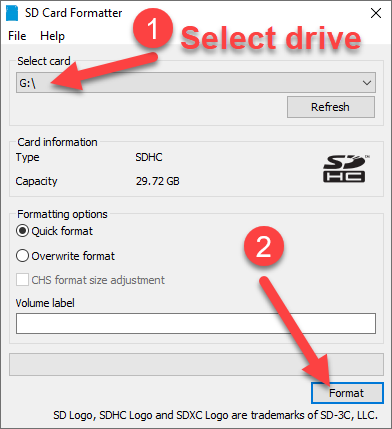
Format an SD Card
Acquire an SD card which you can dedicate to this project. If your SD card has 64GB+ of storage, you’ll struggle to format it to the desired FAT32 format. In which case, you’ll want to use this too.
- If using a 32GB or less SD card, download SD Card Formatter tool
- Unzip, run setup
Install an Operating System
We’ll be using NOOBS (aka “New Out Of the Box Software”) for this tutorial.
- Download NOOBS using the torrent file option (do not select “Lite” version).
- Extract the downloaded file into its own folder, then copy the contents of that folder to the root of your microSD card.
- Once fully copied, take the SD card out of your computer and instert into the Raspbery Pi. Plug in your Raspberry Pi and any components needed (e.g. Monitor, keyboard, mouse).
- Light on the Pi device should blink
Install PiVPN
O
Enable SSH
I’ll be running a headless Pi (no monitor), so would like the ability to access it through SSH. Unfortunately SSH is not enabled by default on a Raspbian system, but this can be resolved quite easily by starting the systemd service:
sudo systemctl enable ssh
sudo systemctl start ssh