July 19, 2020 Images MongoDB File storage
Overview
In an attempt to add a bit of flair and color to my crypto-bot app I decided to add some logos for each cryptocurrency to my app’s UI. For this effort, I will be using an NPM package which I found that supplies a huge set of cryptocurrency logo icons.
But now that I have the icons on my filesystem, the logistics of actually using them is a bit trickier than it might seem on the surface. For example, each time we load a list of products out of my database, I then have to use the ticker (e.g. BTC) to call up and match any cryptocurrency reference to it’s associated icon file from the package in the node_modules directory.
This will certainly work, but is there a way we can make life a little easier? For example, is it possible instead to insert these icons into our MongoDB database in a way that they’re associated with their cryptocurrency record and can be returned with the results of each query?
Well the answer is yes!
In this post I’ll show you how I pulled this off (as you can see in the image below). We’ll learn about the datatypes at play, how to write the image to MongoDB using Mongoose, and how to to read the image out of MongoDB. Let’s go!
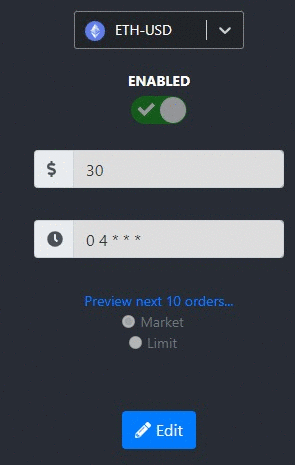
The icons rendered here are all rendered
directly from storage in MongoDB
Operation sequence and file types
The logo images we’re working with happen to be in .png format, but really, it can be any. The goal is to convert the image into a format that can be saved to our database, then extracted and translated back into a .png later on.
Broadly, the sequence we’ll be working with looks like this:
- Read file from filesystem and assign resulting raw buffer to a variable
- Save this raw buffer to MongoDB as type
Buffer - When needed, application now reads the raw buffer (byte array) out of the database and assigns it to a variable
- Convert the raw buffer into base64 string which can then be mapped to the
srcattribute in an<img>tag
Preaparing MongoDB to recevie
First thing is first. We’ll need to setup MongoDB so that it is prepared to accept our file into the datbase. Assuming we’re using Mongoose, we’ll need to update the schema to accpet the “Buffer” type.
Below, you can see I’ve set a field called image which contains a data property which is where we’ll keep our buffer value, as well as a contentType property to define the content type (e.g. img/png).
{
    id: String,
    ...
    image: {
        data: Buffer,
        contentType: String
    }
}
Saving Images to MongoDb
Now that we can write buffers to the database, let’s try it using a node script. This will require the fs and path packages from npm. The following line will write the image to your database.
let filepath = /path/to/img/file
fs.readFile(filepath+"btc.png", (err, img)=>{
    Config.model.findOneAndUpdate(query, set).then((data,err) => {
        if (err) console.log(err);
    })
})
Rendering image in web app
Now that image is in database as a “Buffer”, we’ll assume that we have some API code already in place to pull the data out of MongoDB, and skip to the part where we handle the buffer and convert it to an image that we can render.
First, we know that we have a raw data array. This will need to be converted to a base64 string. We can do this easily with following function:
const toBase64 = (arr) => {
    let newArr = new Uint8Array(arr);
    return btoa(
        newArr.reduce((data, byte) => data + String.fromCharCode(byte), '')
    );
}
The final step is to map this string as the source to an HTML <img> element.
The trick do doing this is to prepend your new base64 string with the following line "data:image/png;base64,"+convertedImg". For example:
let imgsrc = "data:image/png;base64,"+convertedImg" + toBase64(rawBuffer);
Now, we can set this as the source of our image tage like this:
<img src=imgsrc />
Voila! You’ve no rendered your raw buffer into a beautiful new image!